Walk into any commercial gym or browse online bodybuilding forums, and you will immediately encounter two fiercely opposing training philosophies. On one side are the old-school lifters chanting the dogma of "no pain, no gain"—insisting that unless a barbell pins you to the rack or you collapse in agony, the set did not count. On the other side are modern data-driven lifters who claim that training to absolute failure is reckless ego lifting that destroys recovery, ruins joint health, and blunts athletic performance.
The definitive scientific answer lies in a nuanced middle ground governed by exercise physiology: you do not need to take every set to absolute muscular failure to build maximum muscle mass. Rigorous clinical trials and comprehensive meta-analyses demonstrate that ending your sets within 1 to 3 Reps in Reserve (RIR) stimulates virtually identical muscle protein synthesis and long-term hypertrophy compared to grinding every single repetition to complete exhaustion. Crucially, leaving those 1 to 3 reps in reserve generates only a fraction of the neuromuscular fatigue, allowing you to sustain higher workout volume and progress reliably over time without burning out.
Applying this principle requires understanding how proximity to failure interacts with progressive overload and your overall weekly volume (sets per muscle per week). Here is the complete evidence-based breakdown of how close to failure you should actually train.
Demystifying the Terminology: Failure, RPE, and RIR
To understand how hard to train, we must first establish precise definitions for the terms coaches and researchers use to describe exertion. In gym conversations, "training to failure" is thrown around casually, yet lifters often mean completely different things.
Momentary Muscular Failure (MMF)
Momentary muscular failure—often termed absolute concentric failure—is the exact physiological point during a concentric contraction where the target muscle can no longer generate sufficient force to overcome the external load through the full active range of motion, despite maximal voluntary effort. The barbell or dumbbell literally grinds to a halt mid-repetition.
Technical Failure
Technical failure occurs when the lifter can no longer complete another repetition with biomechanically sound, repeatable form. For instance, if your lower back rounds excessively during a deadlift, your elbows flare uncontrollably during a bench press, or you use excessive hip swing during a curl, you have reached technical failure. In bodybuilding and strength sports, your sets on free-weight movements should always terminate at or before technical failure. Grinding past technical failure does not train the target muscle more effectively; it merely shifts mechanical stress onto passive connective tissues and stabilizer muscle groups.
Volitional Interruption
Volitional interruption is when a lifter ends a set simply because the burning sensation, cardiorespiratory distress, or psychological discomfort becomes unpleasant. Multiple training studies show that uncoached recreational lifters frequently terminate sets 4 to 6 reps before true muscular failure, mistakenly believing they pushed to the brink.
Reps in Reserve (RIR) and the RPE Scale
To quantify how close a set is to failure without needing to fail, strength researchers adapted the Borg Rating of Perceived Exertion (RPE) scale into a repetitions-in-reserve model.
Reps in Reserve (RIR) simply asks: If a gun were to your head, how many more clean repetitions could you have completed before hitting technical failure?
The relationship between RPE and RIR is straightforward:
- 10 RPE = 0 RIR: Absolute failure. Zero additional repetitions could be completed with good technique.
- 9.5 RPE = 0–1 RIR: No full repetitions left, but perhaps a tiny load increment could have been attempted.
- 9 RPE = 1 RIR: Exactly one more repetition could be completed with good form.
- 8 RPE = 2 RIR: Two more repetitions could be completed before failure.
- 7 RPE = 3 RIR: Three repetitions left in the tank; bar speed is visibly brisk.
- 6 RPE or less = 4+ RIR: Warm-up or light speed work; insufficient proximity to failure for optimal hypertrophy unless volume is exceptionally high.
The Physiology of Proximity to Failure
Why does proximity to failure matter so profoundly for muscle building? The answer lies in the fundamental neuro-musculoskeletal mechanisms of muscle hypertrophy.
Henneman's Size Principle and Motor Unit Recruitment
Muscles are organized into motor units, each consisting of a motor neuron and the specific muscle fibers it innervates. Under Henneman's Size Principle, the central nervous system recruits motor units in an orderly, hierarchical fashion—from smallest (low-threshold, fatigue-resistant Type I slow-twitch fibers) to largest (high-threshold, powerful Type II fast-twitch fibers).
Fast-twitch fibers have the greatest capacity for growth. To stimulate hypertrophy, you must recruit these high-threshold motor units and subject their constituent muscle fibers to high levels of mechanical tension.
There are two primary ways to achieve full motor unit recruitment:
- Lift very heavy loads (typically above 80–85% of your one-rep max): The central nervous system recruits almost all motor units immediately on rep one to produce the required force.
- Lift moderate or lighter loads (6–20 reps) close to failure: As low-threshold motor units fatigue during the set, the brain is forced to recruit progressively higher-threshold motor units to maintain force production. By the time you reach the final 3 to 5 repetitions of a hard set, virtually 100% of the muscle's motor units are actively firing.
Involuntary Velocity Loss and Mechanical Tension
Hypertrophy is not triggered by "the burn" (lactic acid and metabolite accumulation) or simple muscle fatigue. The primary driver of hypertrophy is mechanical tension experienced by individual muscle fibers.
Mechanical tension is dictated by the force-velocity relationship of skeletal muscle. When a muscle fiber contracts quickly, actin and myosin cross-bridges attach and detach rapidly, producing relatively low force per fiber. When a muscle fiber contracts slowly under high voluntary effort, cross-bridges have ample time to attach firmly, producing maximal mechanical tension across the cell membrane (sarcolemma), which activates the intracellular anabolic signaling cascade known as the mTORC1 pathway.
Crucially, during the final 3 to 5 reps before failure, your contraction velocity slows down involuntarily despite pushing as hard as possible. This involuntary grind creates peak mechanical tension on fast-twitch fibers. Research demonstrates that this threshold of high mechanical tension is reached at approximately 2 to 3 RIR. Pushing past 1 RIR to absolute 0 RIR does not recruit new muscle fibers because they are already fully recruited; it only extends the duration of tension by a single rep.
What the Scientific Literature Proves
Does that final grinding repetition to complete failure produce superior muscle growth?
To answer this question conclusively, a landmark systematic review and meta-analysis led by Martin C. Refalo, along with researchers Eric R. Helms, Eric T. Trexler, D. Lee Hamilton, and Jackson J. Fyfe, investigated the influence of resistance training proximity-to-failure on skeletal muscle hypertrophy.[1]
Analyzing all available peer-reviewed clinical trials where resistance training performed to momentary muscular failure was directly compared to non-failure resistance training, the authors determined that training to complete failure provided no statistically significant advantage for skeletal muscle hypertrophy over non-failure training when volume was equated.[1]
The researchers noted a non-linear relationship between proximity to failure and hypertrophy: while sets must be taken reasonably close to failure (within roughly 1 to 3 RIR) to ensure full motor unit recruitment, pushing through to absolute failure yields diminishing returns. In other words, a set ending at 1 or 2 RIR provides virtually all the muscle-building stimulus of a set taken to failure, without the severe neuromuscular drawbacks.

The Fatigue Penalty: Why Absolute Failure Backfires
If 0 RIR and 2 RIR stimulate roughly the same muscle growth per set, why not simply train to failure every time just to be certain? The reason is the disproportionate physiological cost: the fatigue-to-stimulus ratio (FSR).
Fatigue generated during weight training is divided into two distinct components:
- Peripheral Fatigue: Local metabolic changes within the muscle itself (glycogen depletion, calcium ion handling impairment, phosphate accumulation). Peripheral fatigue dissipates relatively rapidly, usually within 2 to 5 minutes of rest between sets.
- Central Nervous System (CNS) Fatigue: A reduction in the motor cortex and spinal cord's capacity to send voluntary electrical impulses to working muscles.
When you grind a repetition to absolute concentric failure, central nervous system fatigue spikes exponentially. Research on neuromuscular kinetics shows that training to failure induces significantly greater acute neuromuscular fatigue and prolongs recovery time up to 48 to 72 hours compared to stopping 1 to 3 reps short.
The Real-World Volume Loss
The sharp spike in central and peripheral fatigue caused by training to failure damages performance on subsequent sets. Consider two lifters performing three working sets of the barbell bench press with 100 kg (220 lb):
| Training Approach | Set 1 Performance | Set 2 Performance | Set 3 Performance | Total Repetitions | Total Mechanical Tonnage |
|---|---|---|---|---|---|
| Lifter A (All Sets to Failure / 0 RIR) | 10 reps (failure) | 6 reps (acute fatigue) | 4 reps (complete exhaustion) | 20 reps | 2,000 kg |
| Lifter B (Autoregulated at 2 RIR) | 8 reps (2 RIR) | 8 reps (2 RIR) | 8 reps (1–2 RIR) | 24 reps | 2,400 kg |
Lifter B completed 20% more high-tension mechanical volume than Lifter A. Because total volume of hard sets is one of the strongest drivers of long-term muscle hypertrophy, Lifter B achieved a superior hypertrophic stimulus with cleaner technique, less joint wear, and significantly faster recovery.
The RIR and RPE Master Guide
To apply reps in reserve effectively, you need a structured framework to match your target RIR with the right exercise types and fatigue demands.
| RIR Target | RPE Scale | Subjective Effort & Bar Speed | Neuromuscular Fatigue | Recommended Movement Types |
|---|---|---|---|---|
| 0 RIR | 10 | Absolute failure; bar grinds to a halt; no further rep possible | Extremely High; requires 48–72h recovery | Machine & cable isolations; final set only |
| 1 RIR | 9 | Extremely hard; bar speed noticeably slowed; exactly 1 clean rep left | Moderate to High; manageable with 2–3 min rest | Secondary compounds, dumbbells, machine presses |
| 2 RIR | 8 | Solid effort; bar speed slows slightly on final rep; 2 clean reps left | Low to Moderate; easily repeatable across sets | Primary compound barbell lifts (squats, benches) |
| 3 RIR | 7 | Moderate effort; steady bar speed; 3 clean reps left | Very Low; minimal systemic fatigue | Heavy technical lifts (deadlifts), volume accumulation |
| 4+ RIR | 6 or less | Easy effort; fast bar speed; movement feels effortless | Negligible; submaximal stimulus | Warm-up sets, speed work, active recovery |
The Calibration Problem: Are You Really at 2 RIR?
While the RIR concept is scientifically robust, its primary practical limitation is human psychology. Numerous training studies evaluating lifters' ability to predict failure have uncovered a consistent pattern: lifters systematically underestimate their proximity to failure.
When asked to predict when they reach 2 RIR, novice and intermediate lifters often stop 4 to 6 reps short of true failure. If you think you are training at 2 RIR but are actually at 5 RIR, your sets may fall outside the high-tension motor unit recruitment window, severely stalling your muscle gains.
To calibrate your RIR accuracy:
- Test Safe Failure Periodically: On guided machine exercises such as the sled 45° leg press or lat pulldown, occasionally perform an AMRAP (As Many Reps As Possible) set to true momentary muscular failure.
- Note the Sensory Cues: Pay attention to how involuntary bar slowing actually feels during the final 3 reps. True 1 RIR feels uncomfortable and slow.
- Review Video Footage: Film your working sets from the side. Compare your perceived effort to the objective bar velocity. If the bar is still moving briskly when you rack it, you had more than 2 reps left in reserve.
The 3-Tier Exercise Framework: Where Does Failure Belong?
Not all exercises carry the same risk-to-reward profile when taken to failure. Taking a barbell full squat to absolute muscular failure is dangerous and inflicts massive systemic fatigue; taking a cable lateral raise to failure is safe and causes virtually zero central nervous system disruption.
To program proximity to failure intelligently, categorize your exercises into three distinct tiers:
Tier 1: Heavy Axial Free-Weight Compounds (Target: 2–3 RIR)
These are multi-joint, free-weight exercises that place substantial axial (compressive) load on the spine and require complex balance and stabilization:
- Barbell Full Squat
- Barbell Deadlift
- Standing Overhead Press
- Bent-Over Barbell Row
Rule: Never train Tier 1 lifts to absolute concentric failure. Reaching failure on a heavy squat or deadlift risks severe spinal flexion, lumbar disc injury, or dropped weights. Furthermore, the massive systemic fatigue generated by failing a heavy deadlift will compromise the rest of your training session. Stopping at 2 to 3 RIR provides maximal motor unit recruitment with complete technical safety.
Tier 2: Supported Multi-Joint Compounds (Target: 1–2 RIR)
These are compound exercises where the body is supported by a bench or machine tracks, reducing axial spinal fatigue while allowing intense multi-muscle overload:
- Barbell Bench Press (with safety bars or a reliable spotter)
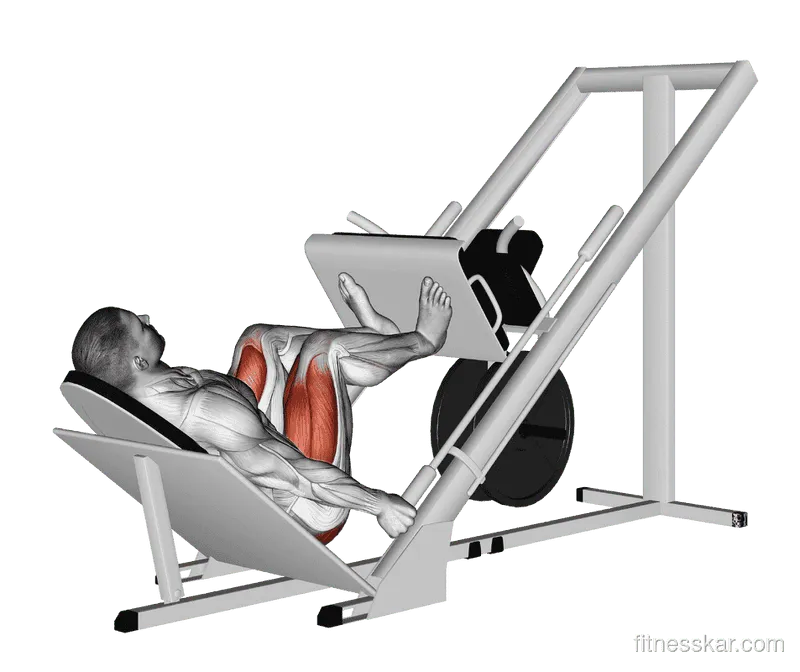
- Sled 45° Leg Press
- Dumbbell Incline Bench Press
- Lat Pulldown
- Chest-Supported Rows
Rule: Train these movements with 1 to 2 RIR on your working sets. You can push hard and safely rack the weight when you know only one clean rep remains.
Tier 3: Machine and Cable Isolation Exercises (Target: 0–1 RIR)
These are single-joint movements targeting isolated muscle bellies:
- Bicep Curl
- Cable Lateral Raise
- Triceps Cable Pushdowns
- Seated Leg Curls and Leg Extensions
- Standing Calf Raises
Rule: Because these movements involve zero spinal loading and negligible central nervous system fatigue, they are prime candidates for pushing to true failure (0 RIR). Taking the final set of a bicep curl or lateral raise to complete concentric failure is safe, maximizes local muscle fiber exhaustion, and creates an intense metabolic stimulus without hindering your recovery for the next session.

Interactive Exercise Coaching
Integrate these technical principles into your key compound and machine exercises.
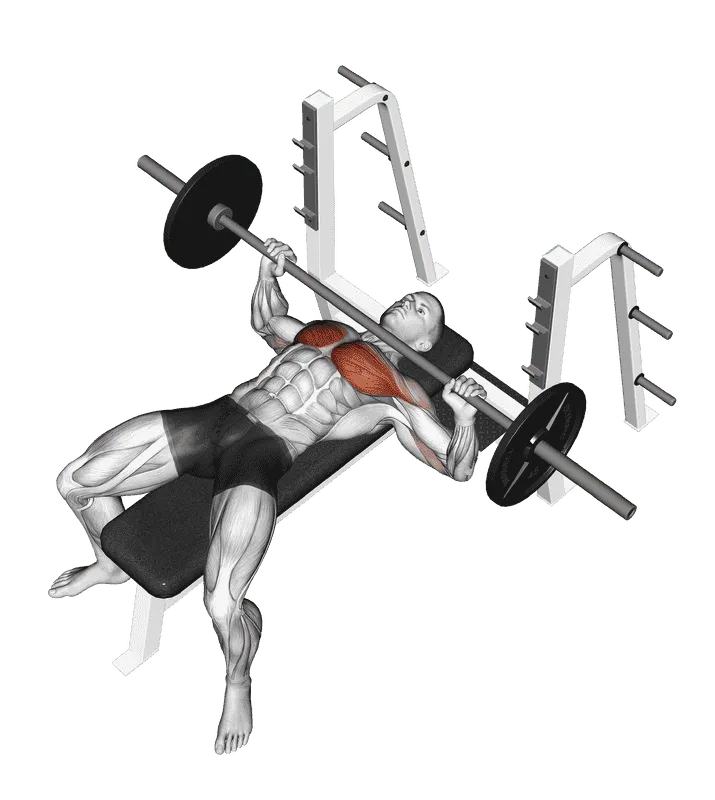
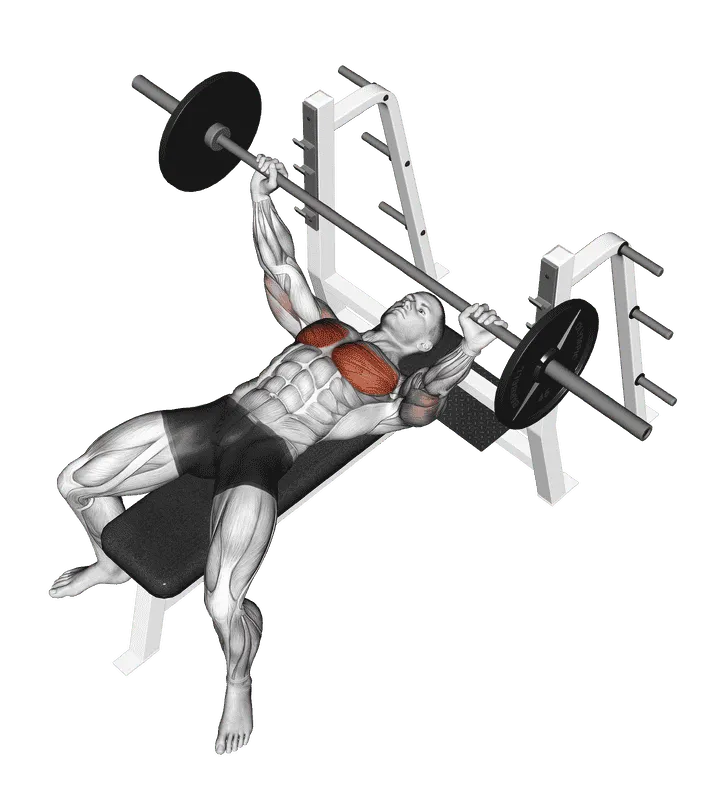
- Sets
- 3–4
- Reps
- 6–8
- Rest
- 180 s
- Tempo
- 3–1–0

- Sets
- 3
- Reps
- 10–12
- Rest
- 120 s
- Tempo
- 2–0–1
Periodizing Proximity to Failure Across a Mesocycle
Proximity to failure should not remain static year-round. If you train at 1 RIR every single week for months on end, systemic fatigue will gradually outpace your recovery capacity, leading to joint irritation and performance stagnation.
The most effective approach is dynamic RIR periodization across a 4-to-6-week mesocycle:
| Week | Phase | Target RIR (Tier 1) | Target RIR (Tier 2) | Target RIR (Tier 3) | Primary Goal |
|---|---|---|---|---|---|
| Week 1 | Introductory Volume | 3 RIR | 2–3 RIR | 2 RIR | Establish baseline volume, dial in technique, introduce new movements |
| Week 2 | Progressive Overload | 2–3 RIR | 2 RIR | 1–2 RIR | Add reps or minor load increments with high technical precision |
| Week 3 | Intensification | 2 RIR | 1–2 RIR | 1 RIR | Peak mechanical tension; push sets hard while managing fatigue |
| Week 4 | Overreaching Peak | 1–2 RIR | 1 RIR | 0 RIR (last set) | Maximize stimulus; take final isolation sets to momentary failure |
| Week 5 | Planned Deload | 4–5 RIR | 4–5 RIR | 3–4 RIR | Cut volume by 50%; dissipate central fatigue while preserving muscle |
This structured wave allows you to capitalize on the high stimulus of near-failure training in Weeks 3 and 4, followed by a planned deload to reset your neuromuscular sensitivity and clear fatigue. To understand how this fits into your overall strength and size goals, read our comprehensive guide on strength vs hypertrophy.
Five Costly Failure Mistakes to Avoid
- Confusing Form Breakdown with Muscular Failure: Cheating reps with jerky momentum or shifting body alignment does not stimulate more growth. It takes tension off the target muscle and places it on your tendons and ligaments. Always stop at technical failure.
- Sandbagging and Mistaking Discomfort for Failure: The burning sensation from lactic acid buildup often kicks in 5 to 6 reps before true muscular failure. Learn to push past discomfort until you see an objective reduction in bar speed.
- Emptying the Tank on Set 1: Going all-out to failure on the very first set of an exercise drains your energy reserves, causing severe performance drops on sets 2, 3, and 4. Keep your first sets at 2 RIR to protect your overall volume.
- Treating Every Exercise the Same: Applying the same failure rules to squats and lateral raises is a recipe for injury. Match your proximity to failure to the exercise's structural and systemic risk.
- Ignoring Recovery and Nutrition: Near-failure training creates micro-tears in muscle fibers and taxes the nervous system. Without adequate dietary protein and 7 to 9 hours of quality sleep, your body cannot adapt to high-effort training.
Frequently Asked Questions
Frequently asked questions
Is training to failure necessary to build muscle?
No. Extensive research, including the 2023 meta-analysis by Refalo et al., demonstrates that training with 1 to 3 Reps in Reserve (RIR) stimulates virtually identical muscle hypertrophy compared to training to absolute failure, while causing significantly less neuromuscular fatigue.
What is the main difference between RIR and RPE?
RPE (Rating of Perceived Exertion) rates total effort on a scale of 1 to 10, whereas RIR (Reps in Reserve) counts the exact number of clean repetitions you had left before technical failure. They are inverse equivalents: 10 RPE equals 0 RIR, 9 RPE equals 1 RIR, and 8 RPE equals 2 RIR.
Should beginners train to failure?
No. Beginners experience rapid neuromuscular and structural adaptations from submaximal loads. Training to failure increases injury risk and ingrains poor movement patterns before proper motor control is mastered. Beginners should generally stay at 2 to 4 RIR.
How do I know if I am truly at 1 or 2 RIR?
True 1 to 2 RIR is marked by an involuntary, noticeable slowing of bar velocity on the final reps despite pushing with maximal intent. You can calibrate your perception by occasionally performing an AMRAP set to true failure on safe machine exercises like the leg press or lat pulldown.
Can advanced lifters benefit from training to failure more than beginners?
Yes. Advanced lifters require a higher relative stimulus to trigger new hypertrophy and have the motor control necessary to train close to failure safely. Even for advanced athletes, failure should primarily be reserved for the final sets of isolation and machine exercises.
Sources
- Refalo, M. C., Helms, E. R., Trexler, E. T., Hamilton, D. L., & Fyfe, J. J. (2023). Influence of Resistance Training Proximity-to-Failure on Skeletal Muscle Hypertrophy: A Systematic Review with Meta-analysis. Sports Medicine, 53(3), 649–665. doi.org/10.1007/s40279-022-01784-y ↩