
If you have ever stepped under a barbell for a prescribed heavy set and felt that the weight was either suspiciously light or impossibly heavy, you have experienced the fundamental flaw of rigid percentage-based programming. Your central nervous system, muscle glycogen stores, and psychological readiness fluctuate from day to day. Autoregulation—adjusting your training load based on your real-time physiological capacity rather than a static spreadsheet—is the solution. The modern Rate of Perceived Exertion (RPE) scale and its companion metric, Reps in Reserve (RIR), give you an exact, objective framework to control your training intensity and ensure every working set produces maximum stimulus with manageable fatigue.
By learning how to measure proximity to muscular failure with precision, you eliminate the guesswork that leads to chronic overtraining, stalled progress, and injury. Instead of blindly adding five pounds to the bar when your body is under-recovered, or holding yourself back when you are primed for a breakthrough, you match your weights to your daily performance. Combined with consistent progressive overload, mastering RPE and RIR will transform the way you approach every compound lift in the gym.
The physiology of autoregulation: Why fixed percentages fail
For decades, traditional strength programming relied almost exclusively on percentages of a lifter's one-rep max (1RM). A coach might write four sets of five reps at 80% of 1RM on the barbell squat. On paper, this appears logical, structured, and progressive. In the real world, human physiology does not operate on a static mathematical curve.
Daily maximal strength is a moving target. Research tracking force production across collegiate and competitive athletes demonstrates that true 1RM capability fluctuates by 10% to 18% in either direction across a typical training week. Several physiological mechanisms drive this variability:
- Neuromuscular recovery: Central nervous system recovery can take anywhere from 24 to 72 hours following heavy spinal loading. If your motor unit firing rates are depressed, a weight that normally feels like an 80% load will demand 90% or more of your available neural drive.
- Substrate availability: Fluctuations in muscle glycogen concentration, electrolyte balance, and cellular hydration directly alter intracellular calcium release and cross-bridge cycling within sarcomeres.
- Sleep architecture and autonomic tone: Poor sleep or chronic life stress tilts your autonomic nervous system toward sympathetic dominance, elevating resting cortisol, impairing motor coordination, and blunting rate of force development (RFD).
When you follow a rigid percentage program on a day when your strength is suppressed by 10%, that scheduled 80% load suddenly becomes 90% of your daily maximum. A submaximal volume workout turns into an unintentional grind to failure, generating massive peripheral fatigue, delaying recovery by days, and disrupting the rest of your training split. Conversely, on days when you feel exceptional and your strength is elevated, fixed percentages under-load your muscular system, leaving potential adaptation on the table.
Autoregulation solves this dilemma. By prescribing a target rep count alongside a target RPE or RIR (for example, "work up to 5 reps at RPE 8"), the absolute weight on the barbell automatically expands or contracts to match your true physiological capacity for that exact session.
What is RPE and how does it connect to RIR?
Perceived exertion in exercise science originated with Gunnar Borg in the 1960s, who developed a 6-to-20 scale designed primarily to track heart rate and cardiovascular effort during aerobic exercise. However, the original Borg scale proved notoriously inaccurate for heavy resistance training. Lifters performing a crushing set of three repetitions on the barbell deadlift might experience modest cardiovascular strain yet face total muscular failure, leading to confusion and inaccurate ratings.
To resolve this issue, exercise physiologist Dr. Michael Zourdos and his team developed the Resistance Training-Specific Rating of Perceived Exertion (RIR-based RPE) scale.[1] Rather than asking lifters how tired they felt, this validated scale anchored perceived exertion directly to a concrete, quantifiable question: How many more successful repetitions could you have completed before hitting muscular failure?
The relationship between RPE and RIR is straightforward: RPE = 10 − RIR.
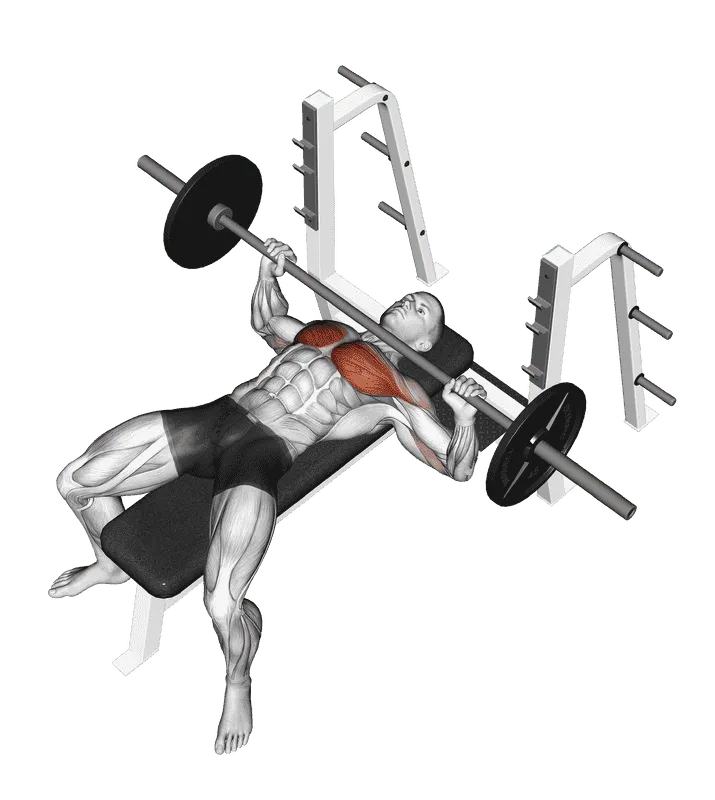
If you rack a set of barbell bench press and know with certainty that you could have completed exactly two more repetitions with acceptable technical form, you performed that set at RPE 8 (10 − 2 = 8).
| RPE Rating | Reps in Reserve (RIR) | Effort Level & Physiological Description | Best Application in Programming |
|---|---|---|---|
| 10 | 0 RIR | Maximum effort. Absolute failure on the next rep; zero additional reps possible. | 1RM testing, powerlifting competitions, final set of an intensification cycle. |
| 9.5 | 0–1 RIR | Near-maximum effort. Could not complete another rep, but could take slightly more weight. | Peak strength testing, heavy singles before competition deloads. |
| 9 | 1 RIR | Extremely heavy. Exactly 1 repetition left in the tank before technical failure. | Primary heavy compound top sets, testing strength boundaries safely. |
| 8.5 | 1–2 RIR | Definite 1 rep remaining, maybe 2 with maximum psychological arousal. | Hypertrophy volume work, progressive load increases on compound lifts. |
| 8 | 2 RIR | Challenging. Exactly 2 solid repetitions left in reserve; bar slows noticeably. | The standard benchmark for strength volume and muscle building sets. |
| 7.5 | 2–3 RIR | Moderately challenging; 2 reps definitely remaining, maybe 3. | Accumulation blocks, speed-strength training, secondary accessory movements. |
| 7 | 3 RIR | Vigorous effort. Weight moves with good speed; 3 full repetitions left in reserve. | Dynamic effort work, technique refinement, first working set of a session. |
| 6–6.5 | 4+ RIR | Light to moderate effort. Bar moves fast; warmup territory or speed work. | Final warm-up sets, active recovery sessions, speed pulls. |
Notice the half-point increments (8.5, 9.5). These provide nuanced flexibility when you are confident you had at least one repetition left, but uncertain whether a second repetition was physically possible.
Neuromuscular mechanics: Motor unit recruitment and velocity loss
Understanding why RPE and RIR work so well requires examining the mechanical and neurological events occurring inside your muscles during a resistance training set.
According to Henneman’s size principle, motor units are recruited in a precise hierarchical order: small, low-threshold motor units (innervating fatigue-resistant Type I slow-twitch fibers) are recruited first for low-force tasks. As force requirements increase—or as lower-threshold fibers fatigue during a continuous set—the central nervous system progressively recruits larger, high-threshold motor units. These high-threshold units innervate Type II fast-twitch muscle fibers, which have the greatest capacity for hypertrophy and high-velocity force production.
When you train with heavy loads (greater than 80% of 1RM), high-threshold motor units are recruited almost immediately from the very first repetition. When training with moderate loads (65% to 75% of 1RM), full motor unit recruitment is achieved only as you approach the final few repetitions of the set—specifically within the RPE 7 to RPE 10 window (3 to 0 RIR).
This brings us to the critical distinction between mechanical tension and systemic fatigue. Research examining training to failure reveals that taking every set to complete failure (RPE 10) does not provide a meaningful hypertrophic advantage over terminating a set at RPE 8 or RPE 9 (1 to 2 RIR). However, the physiological cost of those final grinding repetitions escalates exponentially:
- Excessive neuromuscular fatigue: Grinding to zero RIR causes severe disruption of the excitation-contraction coupling process, depletes intracellular ATP and phosphocreatine reserves, and generates elevated levels of systemic inflammatory markers.
- Velocity loss and mechanical breakdown: In the final rep of an RPE 10 set, mean concentric velocity typically plummets to below 0.15 meters per second. This extreme deceleration exposes passive connective structures, such as tendons and lumbar ligaments, to elevated shear forces as prime movers experience severe motor control degradation.
- Recovery debt: Recovering from multiple sets taken to RPE 10 can take up to 48 hours longer than recovering from sets stopped at RPE 8, drastically limiting the total weekly training volume and frequency your body can handle.
By programming the vast majority of your compound strength work at RPE 7 to RPE 8.5 (1.5 to 3 RIR), you stimulate maximal motor unit recruitment and drive progressive strength adaptations while avoiding the debilitating fatigue penalty of failure.
How to accurately gauge reps in reserve
The most common criticism of autoregulation is that perceived exertion is subjective: can lifters truly estimate their proximity to failure with reliable accuracy?
Sports science investigations into RIR calibration demonstrate that while untrained lifters routinely underestimate their capabilities—often claiming they have zero reps left when they could easily perform four or five more—trained lifters are remarkably accurate, especially when within three reps of failure. Several practical strategies will accelerate your calibration:
1. Video analysis and concentric velocity cues
Your eyes and internal feelings can deceive you during intense sets, but the barbell does not lie. Bar velocity correlates almost perfectly with proximity to failure. On compound lifts like the standing military press or squat, reps performed at RPE 7 move with crisp, uninterrupted acceleration. At RPE 8, you will observe a distinct, brief deceleration through the sticking point. At RPE 9, that sticking point becomes a noticeable struggle, and at RPE 10, the bar crawls to lockout. Recording your working sets from a side angle allows you to visually audit your perceived RIR against actual barbell speed.
2. The "gauge set" protocol
Never attempt to guess your working weight on your very first working set. Instead, use your final warm-up sets as calibrated diagnostic tools:
- Warm up to roughly 85% to 90% of your expected working weight for the day.
- Perform a single repetition or a crisp double.
- Rate the RPE of that warm-up rep. If the bar moves effortlessly (RPE 6), proceed with your planned target weight or add a small 2.5 kg (5 lb) increment. If the bar feels sluggish and heavy (RPE 7.5+ for a single), adjust your planned working weight downward by 3% to 5% immediately.
3. Safe calibration testing on machines
Periodically testing your true limits is necessary to recalibrate your internal compass. However, you should never test failure recklessly on heavy squats or bench presses without experienced spotters or safety pins. Instead, use safe, supported movements like leg presses, chest-supported rows, or dumbbell presses. Take a set to true, momentary muscular failure, noting exactly when you thought you had two reps left versus what your body actually delivered.

Step-by-step programming: How to integrate RPE into your workouts
Transitioning from rigid percentages to an autoregulated framework does not mean training without numbers or structure. In fact, elite strength programs use RPE to create tighter, more disciplined progressions. Here are the three most effective protocols for structuring your workouts:
Method 1: The top set and back-off percentage
This is the gold standard method used by competitive powerlifters and advanced strength athletes. You perform a single heavy "top set" at a prescribed RPE to capture maximal strength stimulus for the day, followed by submaximal volume sets calculated as a fixed percentage reduction of that top set:
- Top Set: 1 set of 3 reps @ RPE 8 (leaving 2 reps in reserve).
- Load Calculation: If you hit 140 kg (308 lb) for that top set, drop the load by 10% to 12% (approximately 125 kg / 275 lb).
- Back-Off Sets: Perform 3 sets of 5 reps with that reduced weight. Because the load is calibrated directly from your demonstrated capacity in the top set, your back-off volume automatically hits the optimal RPE 7 to 8 range.
Method 2: Target RPE ranges
Instead of assigning a single static number, assign a small window of allowable exertion, such as 3 sets of 6 reps @ RPE 7–8.
- Set 1: You choose a weight that lands at RPE 7.
- Set 2: With accumulated fatigue, the same weight naturally lands at RPE 8.
- Set 3: If your fatigue causes the final set to exceed RPE 8.5, you reduce the load slightly for the final reps, keeping your volume cleanly within the prescribed threshold.
Method 3: Fatigue stops
Fatigue stop protocols set an upper limit on intra-session exhaustion. You select a weight and perform sets until your RPE climbs by a predetermined margin:
- Prescribe: Sets of 5 reps starting at RPE 7 with 100 kg.
- Stop condition: Terminate the exercise as soon as a set reaches RPE 9 (a 2-point fatigue accumulation).
- On high-energy days, you might complete five full sets before hitting that ceiling; on fatigued days, you might reach it after three sets. In both cases, you achieve the exact stimulus required without overreaching.


- Sets
- 3–4
- Reps
- 5
- Rest
- 180 s
- Tempo
- 2–0–1

- Sets
- 3–4
- Reps
- 6–8
- Rest
- 150 s
- Tempo
- 2–1–1
When not to use RPE: Limitations and edge cases
While RPE and RIR are indispensable tools for intermediate and advanced lifters, autoregulation is not a universal solution for every training scenario. Recognizing its limitations will save you from common programming pitfalls:
- Complete novices: Beginners following a beginner strength program have not yet developed the neuromuscular efficiency, technical consistency, or psychological familiarity required to gauge failure accurately. Novices will frequently claim a set was at RPE 9 simply because their lungs were burning or their muscles experienced minor lactate accumulation. True beginners should stick to linear percentage progressions until their technique is automated.
- High-repetition sets (15+ reps): On sets of 15 to 25 repetitions (such as leg extensions, lateral raises, or calf work), metabolic acidosis, local burning, and cardiorespiratory strain dominate your perception long before mechanical failure occurs. Estimating whether you have two or three reps left during a burning set of 20 reps is notoriously unreliable. For high-rep metabolic work, simply train to technical failure or 1 RIR without over-analyzing fractional ratings.
- Stubborn ego lifting: Lifters who refuse to lower the weight when their body demands it will use RPE as an excuse to justify poor form, counting sloppy, partial reps as valid repetitions in reserve. RIR ratings are valid only when every repetition maintains pristine technical integrity.
Frequently asked questions
What is the main difference between RPE and RIR?
RPE (Rate of Perceived Exertion) is a 1-to-10 scale that rates the overall difficulty of a set, while RIR (Reps in Reserve) directly states the exact number of additional reps you could have performed before technical failure. They measure the exact same concept using the formula: RPE = 10 − RIR.
Is RPE better than percentage-based training?
RPE is superior for accommodating day-to-day strength fluctuations caused by sleep, stress, and fatigue. However, combining both systems—using percentages to estimate your initial target weight and RPE to fine-tune the final load—produces the best long-term strength results.
How can I tell if my RPE rating is accurate?
Record your working sets on video from a consistent side angle. If you rated a set as RPE 8 (2 reps in reserve), the final repetition should exhibit a slight deceleration but remain steady; if the bar practically stopped and took three seconds to lock out, that was actually an RPE 9.5 or 10.
Should I take any sets to RPE 10?
For general strength and hypertrophy, taking sets to RPE 10 (absolute failure) is rarely necessary and dramatically increases neuromuscular fatigue. Reserve RPE 10 for official powerlifting meets, scheduled 1RM tests, or the final set of a multi-week training cycle.
Sources
- Zourdos MC, Klemp A, Dolan C, et al. Novel resistance training-specific rating of perceived exertion scale measuring repetitions in reserve. Journal of Strength and Conditioning Research. 2016. doi.org/10.1519/JSC.0000000000001049 ↩